Results 1 to 20 of 100

Update on water tanks

| A Day in the Life of a Scrapper

Hybrid View

  1. #1
    Patriot76 started this thread.
    Patriot76's Avatar
    SMF Badges of Honor


    Member since
    Dec 2012
    Location
    Buffalo Commons
    Posts
    2,955
    Thanks
    10,578
    Thanked 7,214 Times in 2,253 Posts
    This picture shows the south side of the tank after cutting down the side. Part of this side was horizontal and I was able to stand on it while cutting. The rest was cut using the loader and a ladder.


    The door in the side was cut to allow access inside the tank to get the ladders in position shown in the previous pictures.

    Last edited by Patriot76; 09-02-2013 at 03:52 AM.

  2. The Following 3 Users say Thank You for This Post by Patriot76:


  3. #2
    Patriot76 started this thread.
    Patriot76's Avatar
    SMF Badges of Honor


    Member since
    Dec 2012
    Location
    Buffalo Commons
    Posts
    2,955
    Thanks
    10,578
    Thanked 7,214 Times in 2,253 Posts
    This shows the south side cut down to the roof. On the north side you can see the ladder that was used to access the roof. It can be seen in a picture of my son earlier in the post.


  4. The Following 4 Users say Thank You for This Post by Patriot76:


  5. #3
    Patriot76 started this thread.
    Patriot76's Avatar
    SMF Badges of Honor


    Member since
    Dec 2012
    Location
    Buffalo Commons
    Posts
    2,955
    Thanks
    10,578
    Thanked 7,214 Times in 2,253 Posts
    This shows the progress on the north side of the tank. The west wing is 16 ft. of steel sitting four ft. off the ground because of a buckle in the roof steel. One of the two new district water tanks can be seen in the back ground. I know I will not be scrapping these for three reasons. One they will out live me, two they have a glass coating, and three I already completed my once in a life time challenge.

    Last edited by Patriot76; 09-02-2013 at 04:02 AM.

  6. The Following 4 Users say Thank You for This Post by Patriot76:


  7. #4
    Patriot76 started this thread.
    Patriot76's Avatar
    SMF Badges of Honor


    Member since
    Dec 2012
    Location
    Buffalo Commons
    Posts
    2,955
    Thanks
    10,578
    Thanked 7,214 Times in 2,253 Posts
    At this point both sides have been lowered and the wings are in the air. I did not want to cut any lower on the north side because the ladder was braced in the ground and I did not know how the tank would buckle with the weight of the wings. The wing on the east side is 24 ft. tall. I had no intention of cutting it in the air and hoped my strategy would work.

    Last edited by Patriot76; 09-02-2013 at 04:12 AM.

  8. The Following 3 Users say Thank You for This Post by Patriot76:


  9. #5
    Patriot76 started this thread.
    Patriot76's Avatar
    SMF Badges of Honor


    Member since
    Dec 2012
    Location
    Buffalo Commons
    Posts
    2,955
    Thanks
    10,578
    Thanked 7,214 Times in 2,253 Posts
    It was time to test my theory. This shows the tank after cutting the west wing down. I started by cutting down the remaining north side wall then started cutting where the wing met the roof. As I cut the wing slowly started laying down. When I cut down the south wall, the wing laid down quietly. Relief. I started on this side because it was not as tall or wide as the other wing. The ladder in the foreground was put there on purpose. It is the old footing for a wind mill they use to have. It had bolts sticking up and I did not want to drive over it and blow a tire. This way I could blow a tire and ruin a ladder at the same time.

    These pictures do not do justice to the size of the metal I was dealing with.


  10. The Following 3 Users say Thank You for This Post by Patriot76:


  11. #6
    Patriot76 started this thread.
    Patriot76's Avatar
    SMF Badges of Honor


    Member since
    Dec 2012
    Location
    Buffalo Commons
    Posts
    2,955
    Thanks
    10,578
    Thanked 7,214 Times in 2,253 Posts
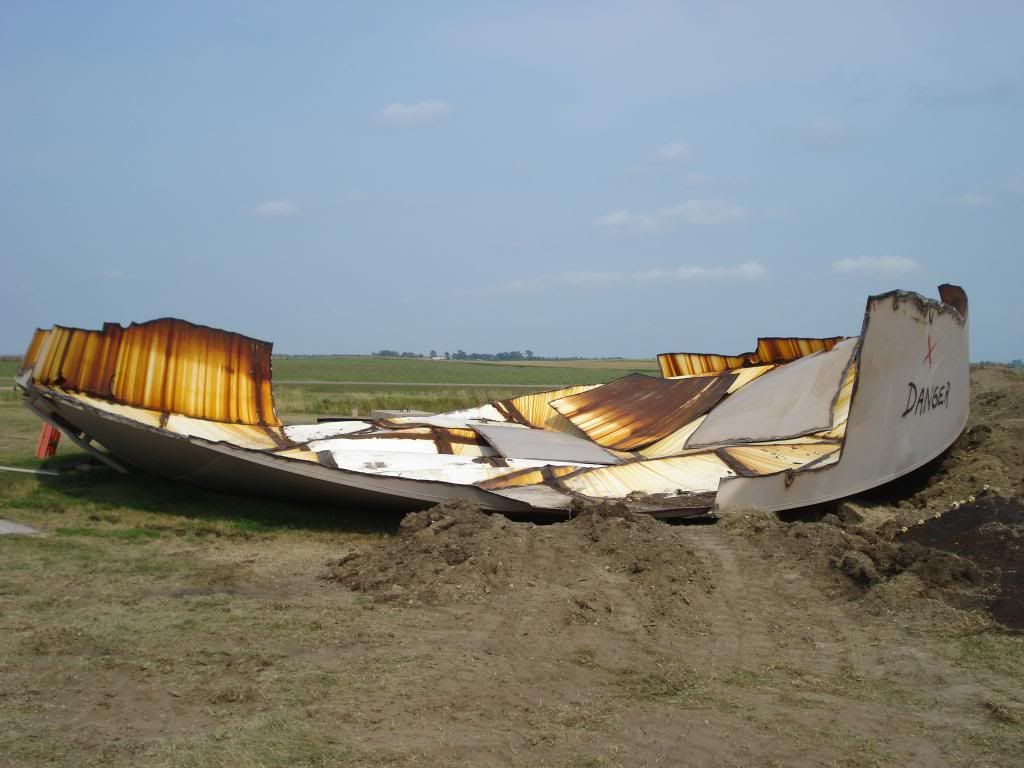
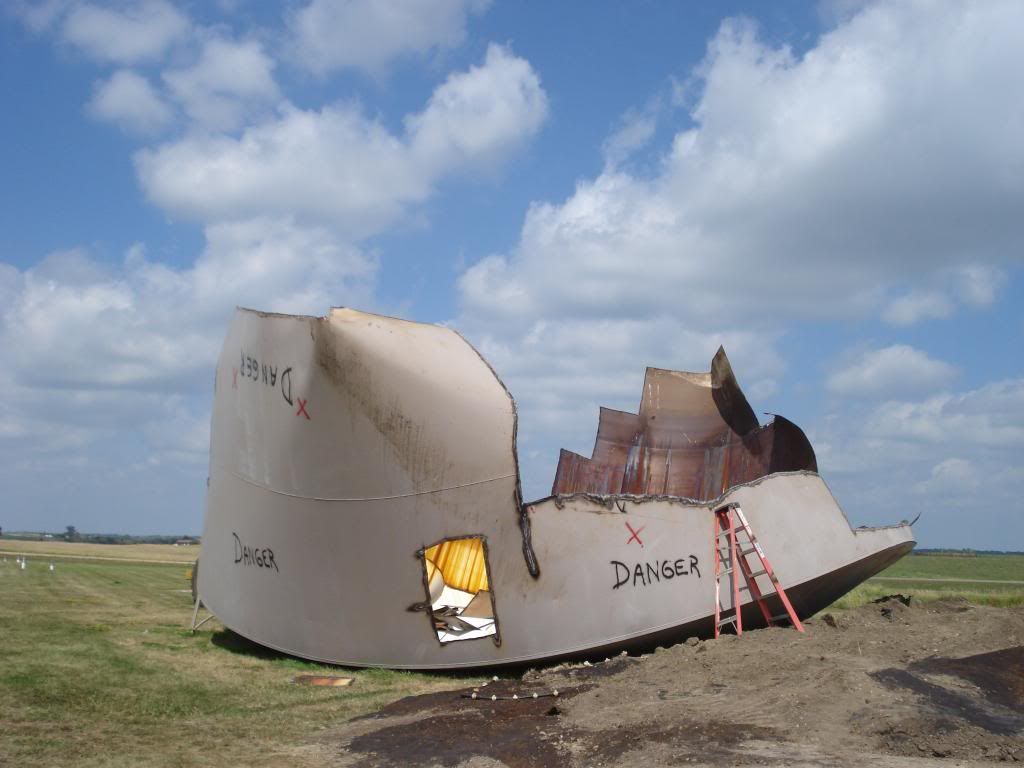
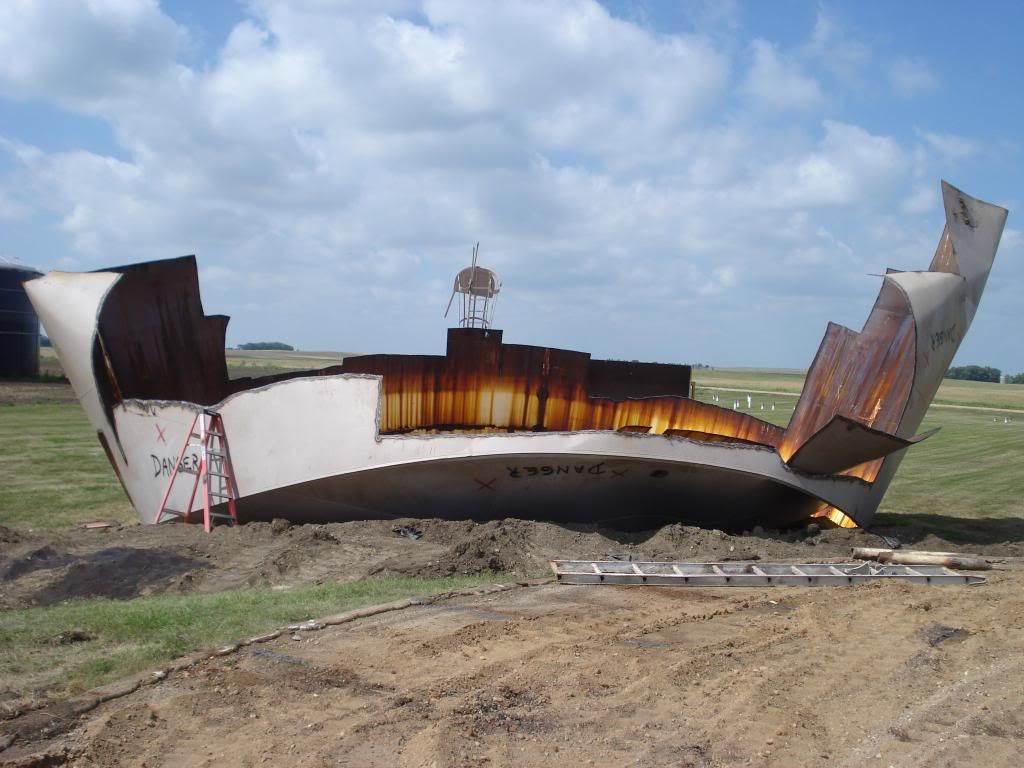
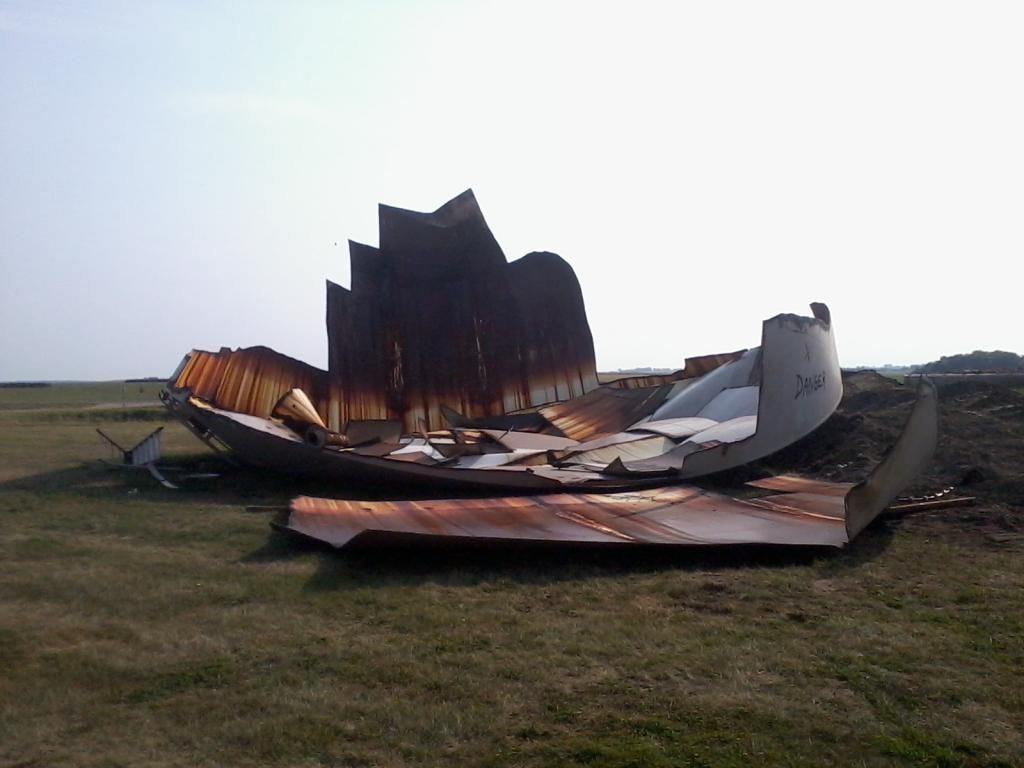
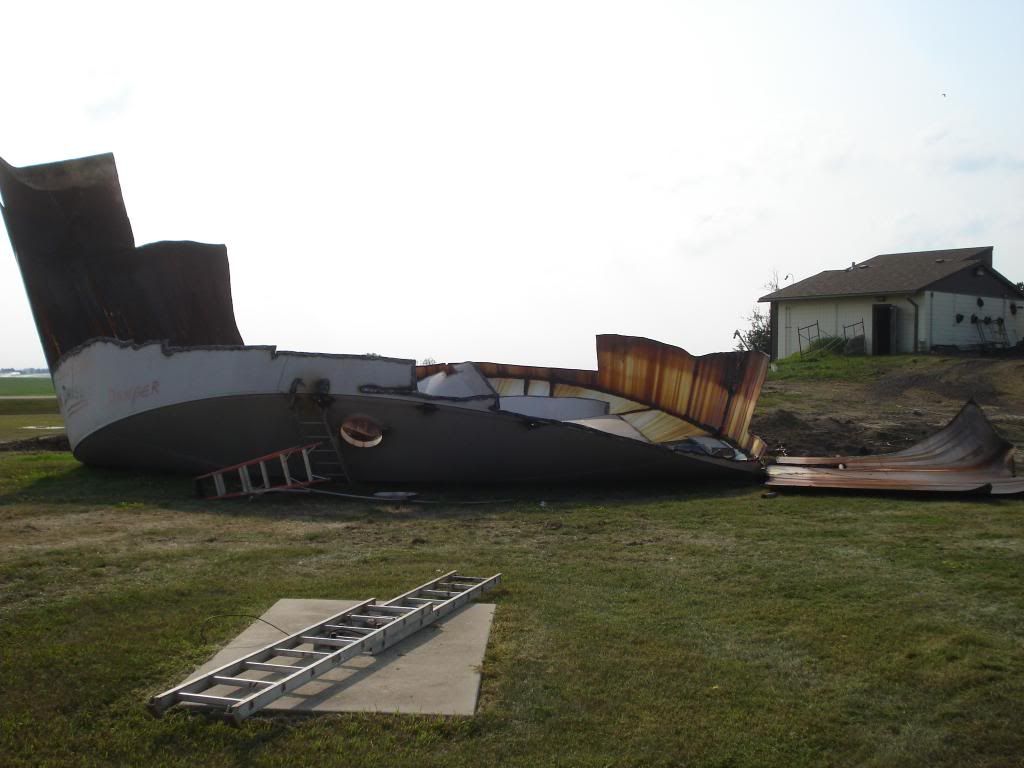
    The same process was used on the east wing, cutting down the south wall, along where it met the roof, and finally down the north wall. Same results and relief. In the foreground you can see the ramp to access the inside of the tank with my skid steer. When I would get over heated and tired of cutting I would load the steel I could get to. I tried to haul loads during the heat of the day. I was trying to get as much steel in as fast as I could because I was fearful the price of steel would drop.

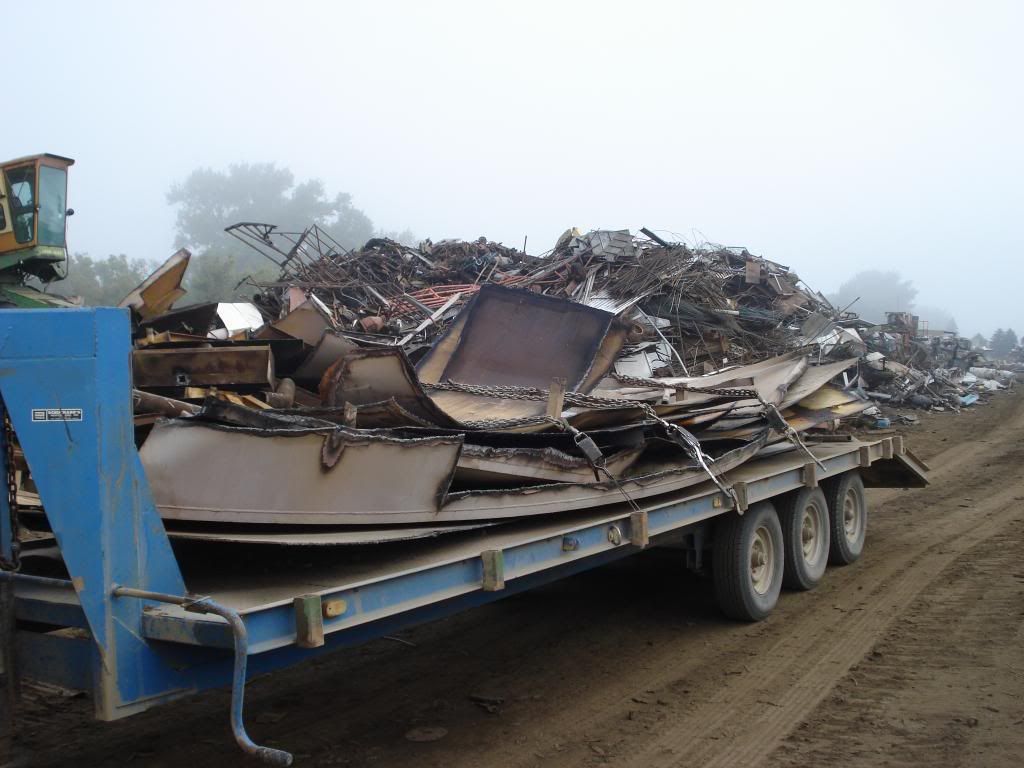
    I sold the majority of the steel as unprepared. I was good enough with a torch to make money preparing it, but did not want to be in a situation where the price of steel dropped and my prepared was worth as much as it was a day before unprepared. Another consideration was the load itself. It was easier to haul large pieces than the prepared steel. I made a deal with the scrap yard that prepared could be cut 5 ft. x 18 in. Using liquid oxy., propane, and scrapping torch reduced my costs a lot, but not enough to gamble with the fluctuating market.

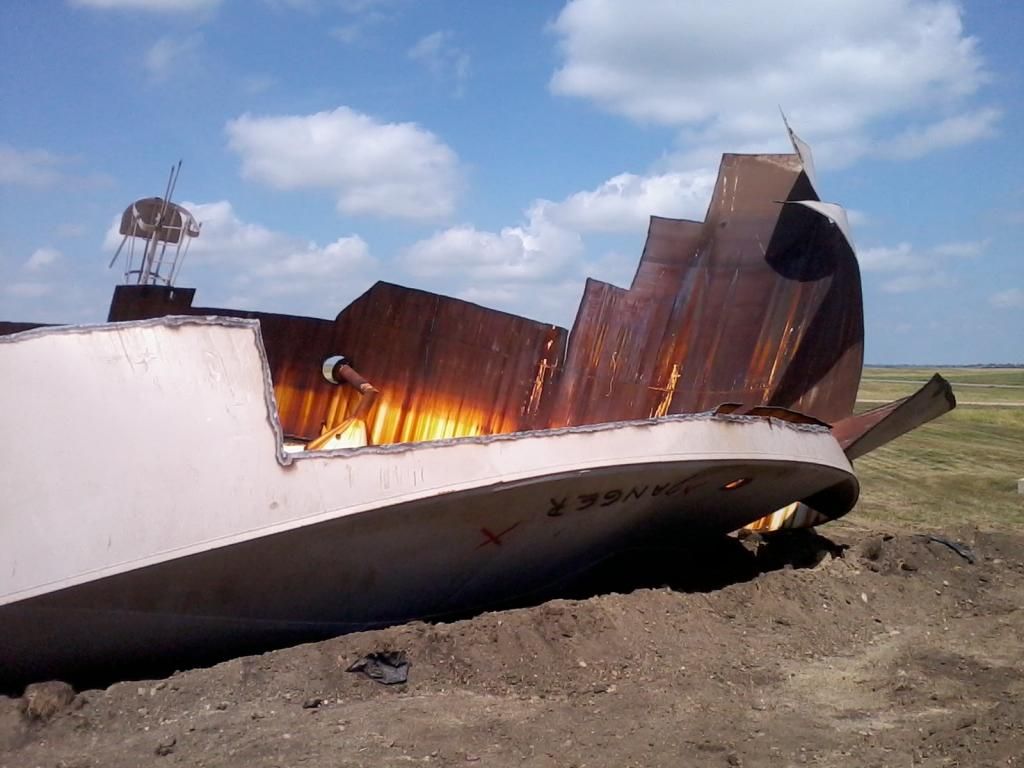
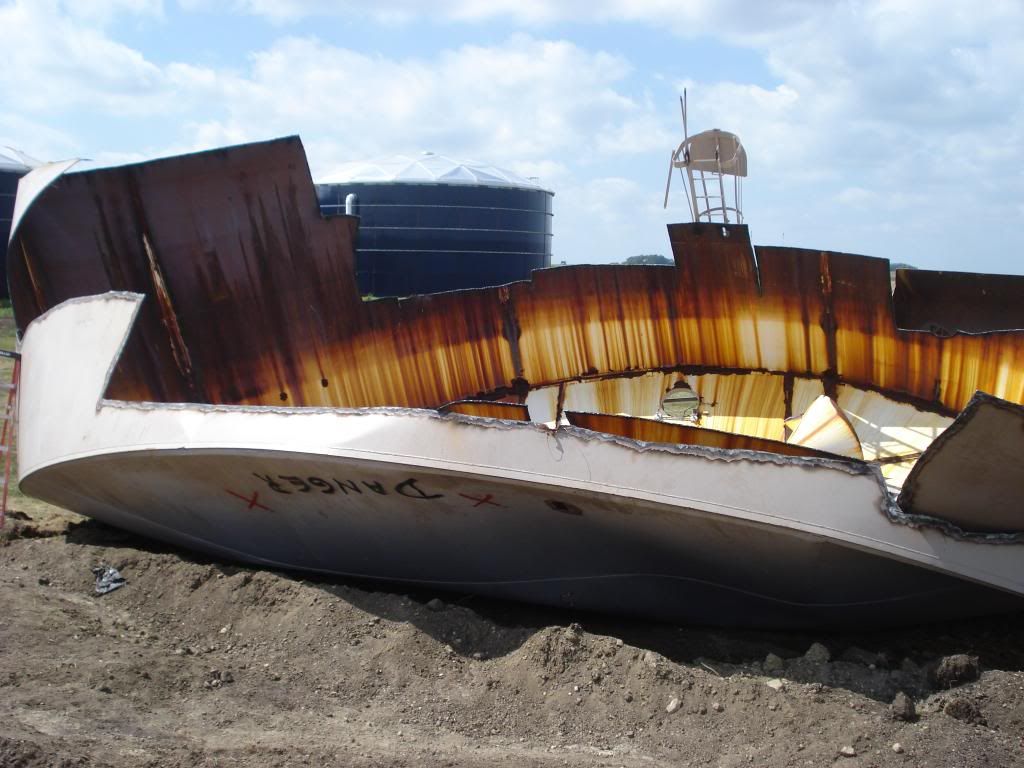
    From this point on the cutting was on the ground with no surprises. Physically I was worn out and used a stool to cut from this point on. This was where the boots took a beating. Sitting on the steel while cutting melted the rubber. I used my leather cape, chaps, and welding jackets to deflect the heat, but it did not save the boots and destroyed all of them. The additional problem was the rust from the beams on the roof. Melting it while cutting the steel did a number on the torch tips. The second part of the story involves the water filters, an even bigger challenge. I will be documenting this story in future posts.

    I also need to thank the managers of the water district for their help and support. They are amazing individuals that have a great deal of common sense and are down to earth individuals. I mentioned several of their contributions, but they had many more. I learned a great deal from them. Without them I could not have completed the project.

    Last edited by Patriot76; 09-04-2013 at 02:57 PM.

  12. The Following 4 Users say Thank You for This Post by Patriot76:


  13. #7
    Patriot76 started this thread.
    Patriot76's Avatar
    SMF Badges of Honor


    Member since
    Dec 2012
    Location
    Buffalo Commons
    Posts
    2,955
    Thanks
    10,578
    Thanked 7,214 Times in 2,253 Posts
    This is a picture of the last load cut from the picture above. My loads averaged six tons each. In the picture above in the front right corner you can see a torch mark. That same piece of steel is in the front foreground of the trailer.

    I should mention I am a retired educator after 30 years in the profession. Before that I was a millwright for five years building sawmills. I have two knee replacements caused from wrestling in college. And the real kicker, I am scared to death of heights. Now you know why this was a personal challenge I could not pass up. It was never about the money, only the challenge. Live life to the fullest.

    Last edited by Patriot76; 09-02-2013 at 05:25 AM.

  14. The Following 8 Users say Thank You for This Post by Patriot76:


Thread Information

Users Browsing this Thread

There are currently 1 users browsing this thread. (0 members and 1 guests)

 
Browse the Most Recent Threads
On SMF In THIS CATEGORY.


OR

Bookmarks

Posting Permissions

  • You may not post new threads
  • You may not post replies
  • You may not post attachments
  • You may not edit your posts
  •  

The Scrap Metal Forum

    The Scrap Metal Forum is the #1 scrap metal recycling community in the world. Here we talk about the scrap metal business, making money, where we connect with other scrappers, scrap yards and more.

SMF on Facebook and Twitter

Twitter Facebook